Earlier than starting this tutorial you will have to put in and activate the free Jetpack plugin. Read this post for instructions on how to install Jetpack.
Jetpack features a easy widget which you need to use to simply add pictures to any of the widget areas obtainable in your presently chosen theme. You possibly can activate further widgets and different options utilizing the Jetpack settings web page, obtainable by clicking on the relevant choice within the sidebar within the administrator dashboard. On this chapter, we’ll check out the method of activating the picture widget and putting a picture within the sidebar of your WordPress website.
How one can Activate the Picture Widget
Activating and managing the assorted options of Jetpack could also be completed from the Jetpack settings web page, which offers a user-friendly interface together with an inventory of options and explanations as to what they do.
- In your administrator dashboard, click on on “Jetpack” near the top-left nook of the web page.
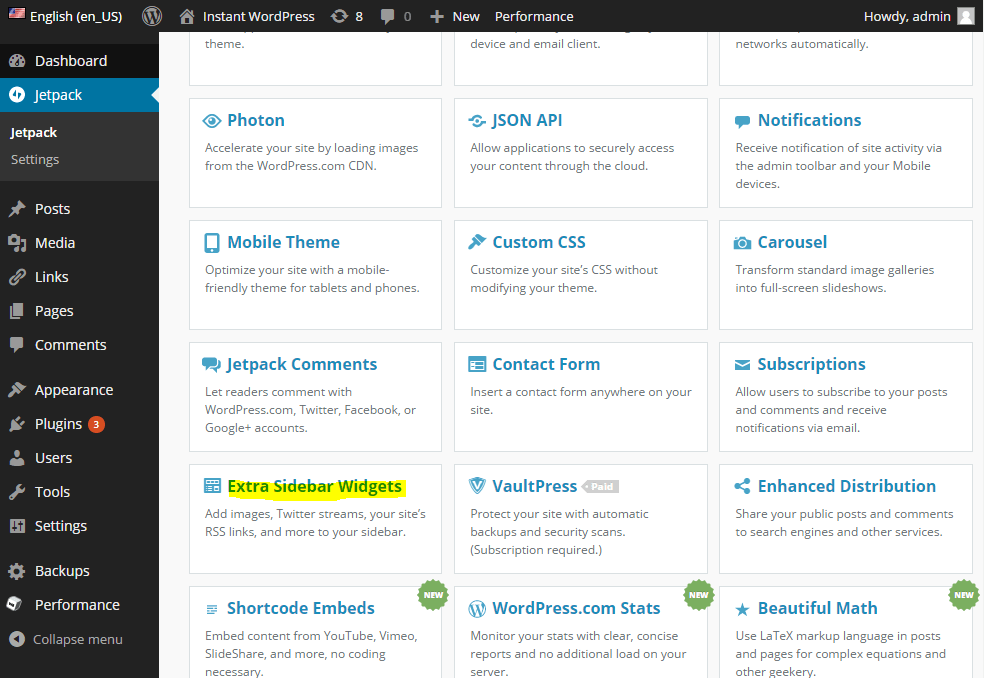
- Scroll down the web page and click on on “View all Jetpack options” to see an inventory of the entire obtainable plugins and widgets.
- Scroll down to search out the “Additional Sidebar Widgets” tile. It is best to discover it within the left-side column. Click on on the tile and click on “Activate”.
How one can Add an Picture to the Sidebar
You possibly can add any picture you wish to the sidebar utilizing the Jetpack Picture widget, supplied that it's within the JPG or PNG format. The picture doesn’t even have to be hosted in your web site both – you possibly can specify any picture positioned on any web site, since all you want is the URL.
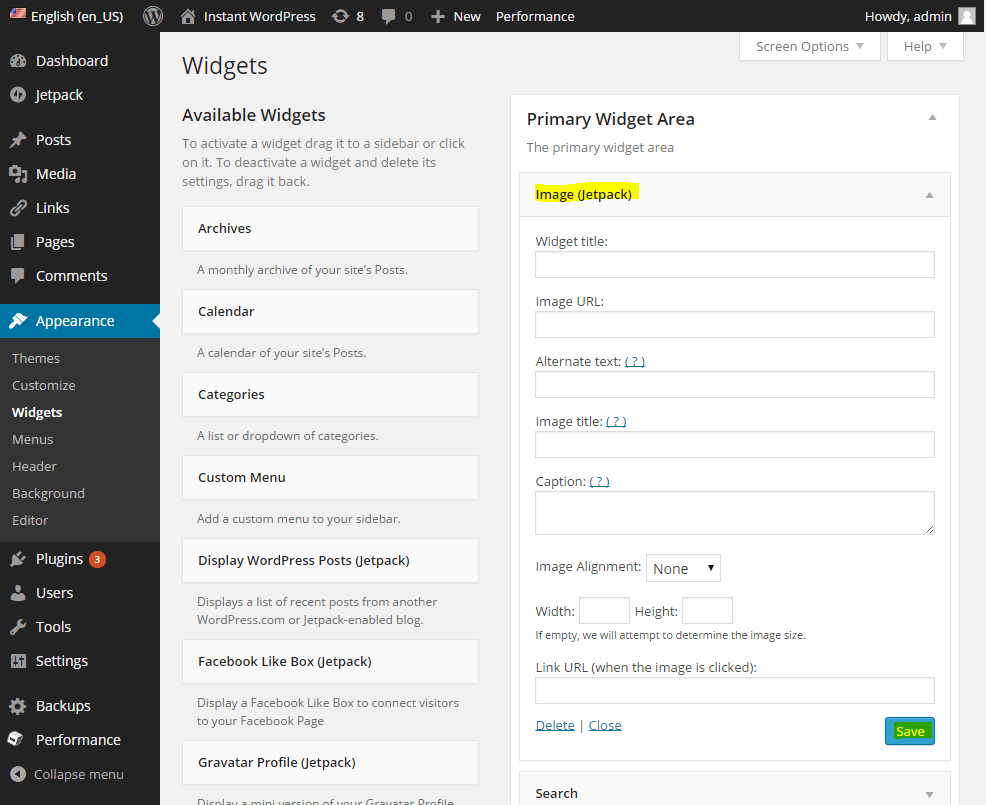
- In your administrator dashboard, mouse over the “Look” button and click on “Widgets” within the pop-up menu.
- Drag and drop the “Picture (Jetpack)” widget from the left-side column to the popular widget space in your proper, comparable to “Main Widget Space”.
- Click on on the activated widget within the right-side column to show the obtainable configuration choices.
- Enter a title for the widget, or depart it clean should you solely wish to show a picture with none accompanying textual content.
- Enter the total URL of the picture within the field beside “Picture URL”. Be sure that the URL hyperlinks on to a picture, together with its file extension, comparable to JPG. You'll first have to add the picture to your WordPress media library (Media -> Add New) after which get the URL from there.
- Fill within the alternate textual content with a couple of phrases describing the picture. This article will seem when somebody strikes the cursor over the picture.
- Enter a title and a caption for the picture if you want. Lastly, select an alignment, and specify a width and peak for the picture in pixels if you want.
- If you wish to flip the picture right into a hyperlink, enter the total URL of the hyperlink you want to use within the “Hyperlink URL” field.
- Click on “Save” to save lots of your adjustments. The picture ought to seem instantly in your WordPress weblog.
That’s all there's to it! You possibly can add as many pictures to your sidebar or different obtainable widget areas as you would like, just by dragging one other occasion of the widget into the specified sidebar space.